The IKEA PAX is Germany's most-hacked wardrobe. Robust, practical, affordable – but identical in millions of households. The good news: with the right PAX hacks, no one will recognize it as an IKEA piece in the end. On Instagram and YouTube, you'll find thousands of inspiringly customized PAX wardrobes – from simple color upgrades to complete DIY built-in closets. We've collected the best ideas: 10 IKEA Hack PAX projects, sorted from big overhauls to quick detail improvements.
1. Convert PAX into a Built-in Wardrobe – the Ultimate Hack
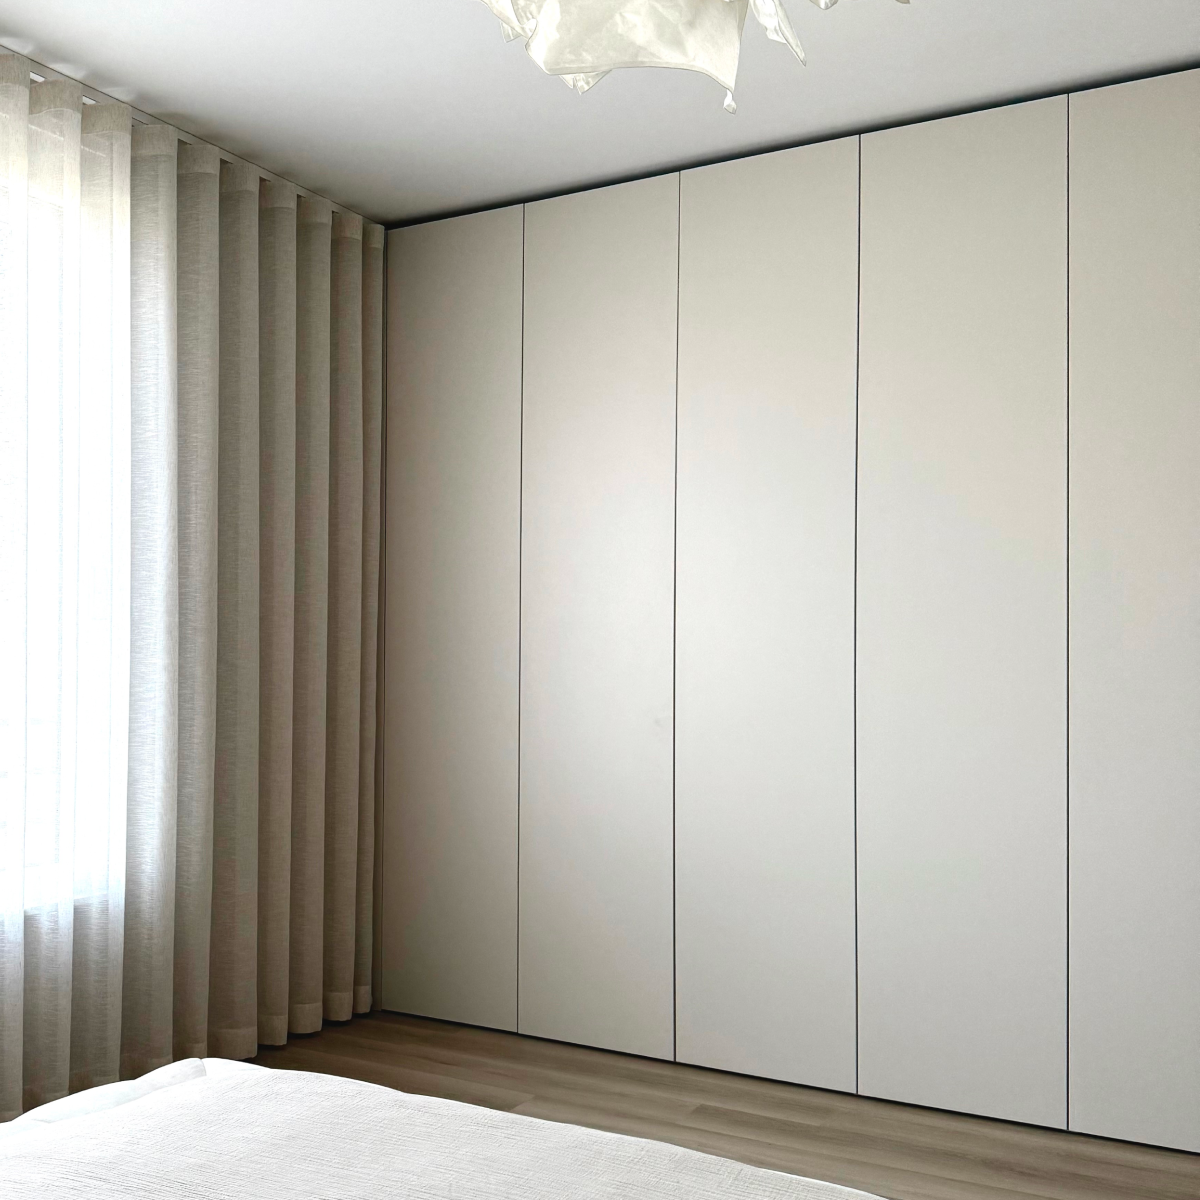
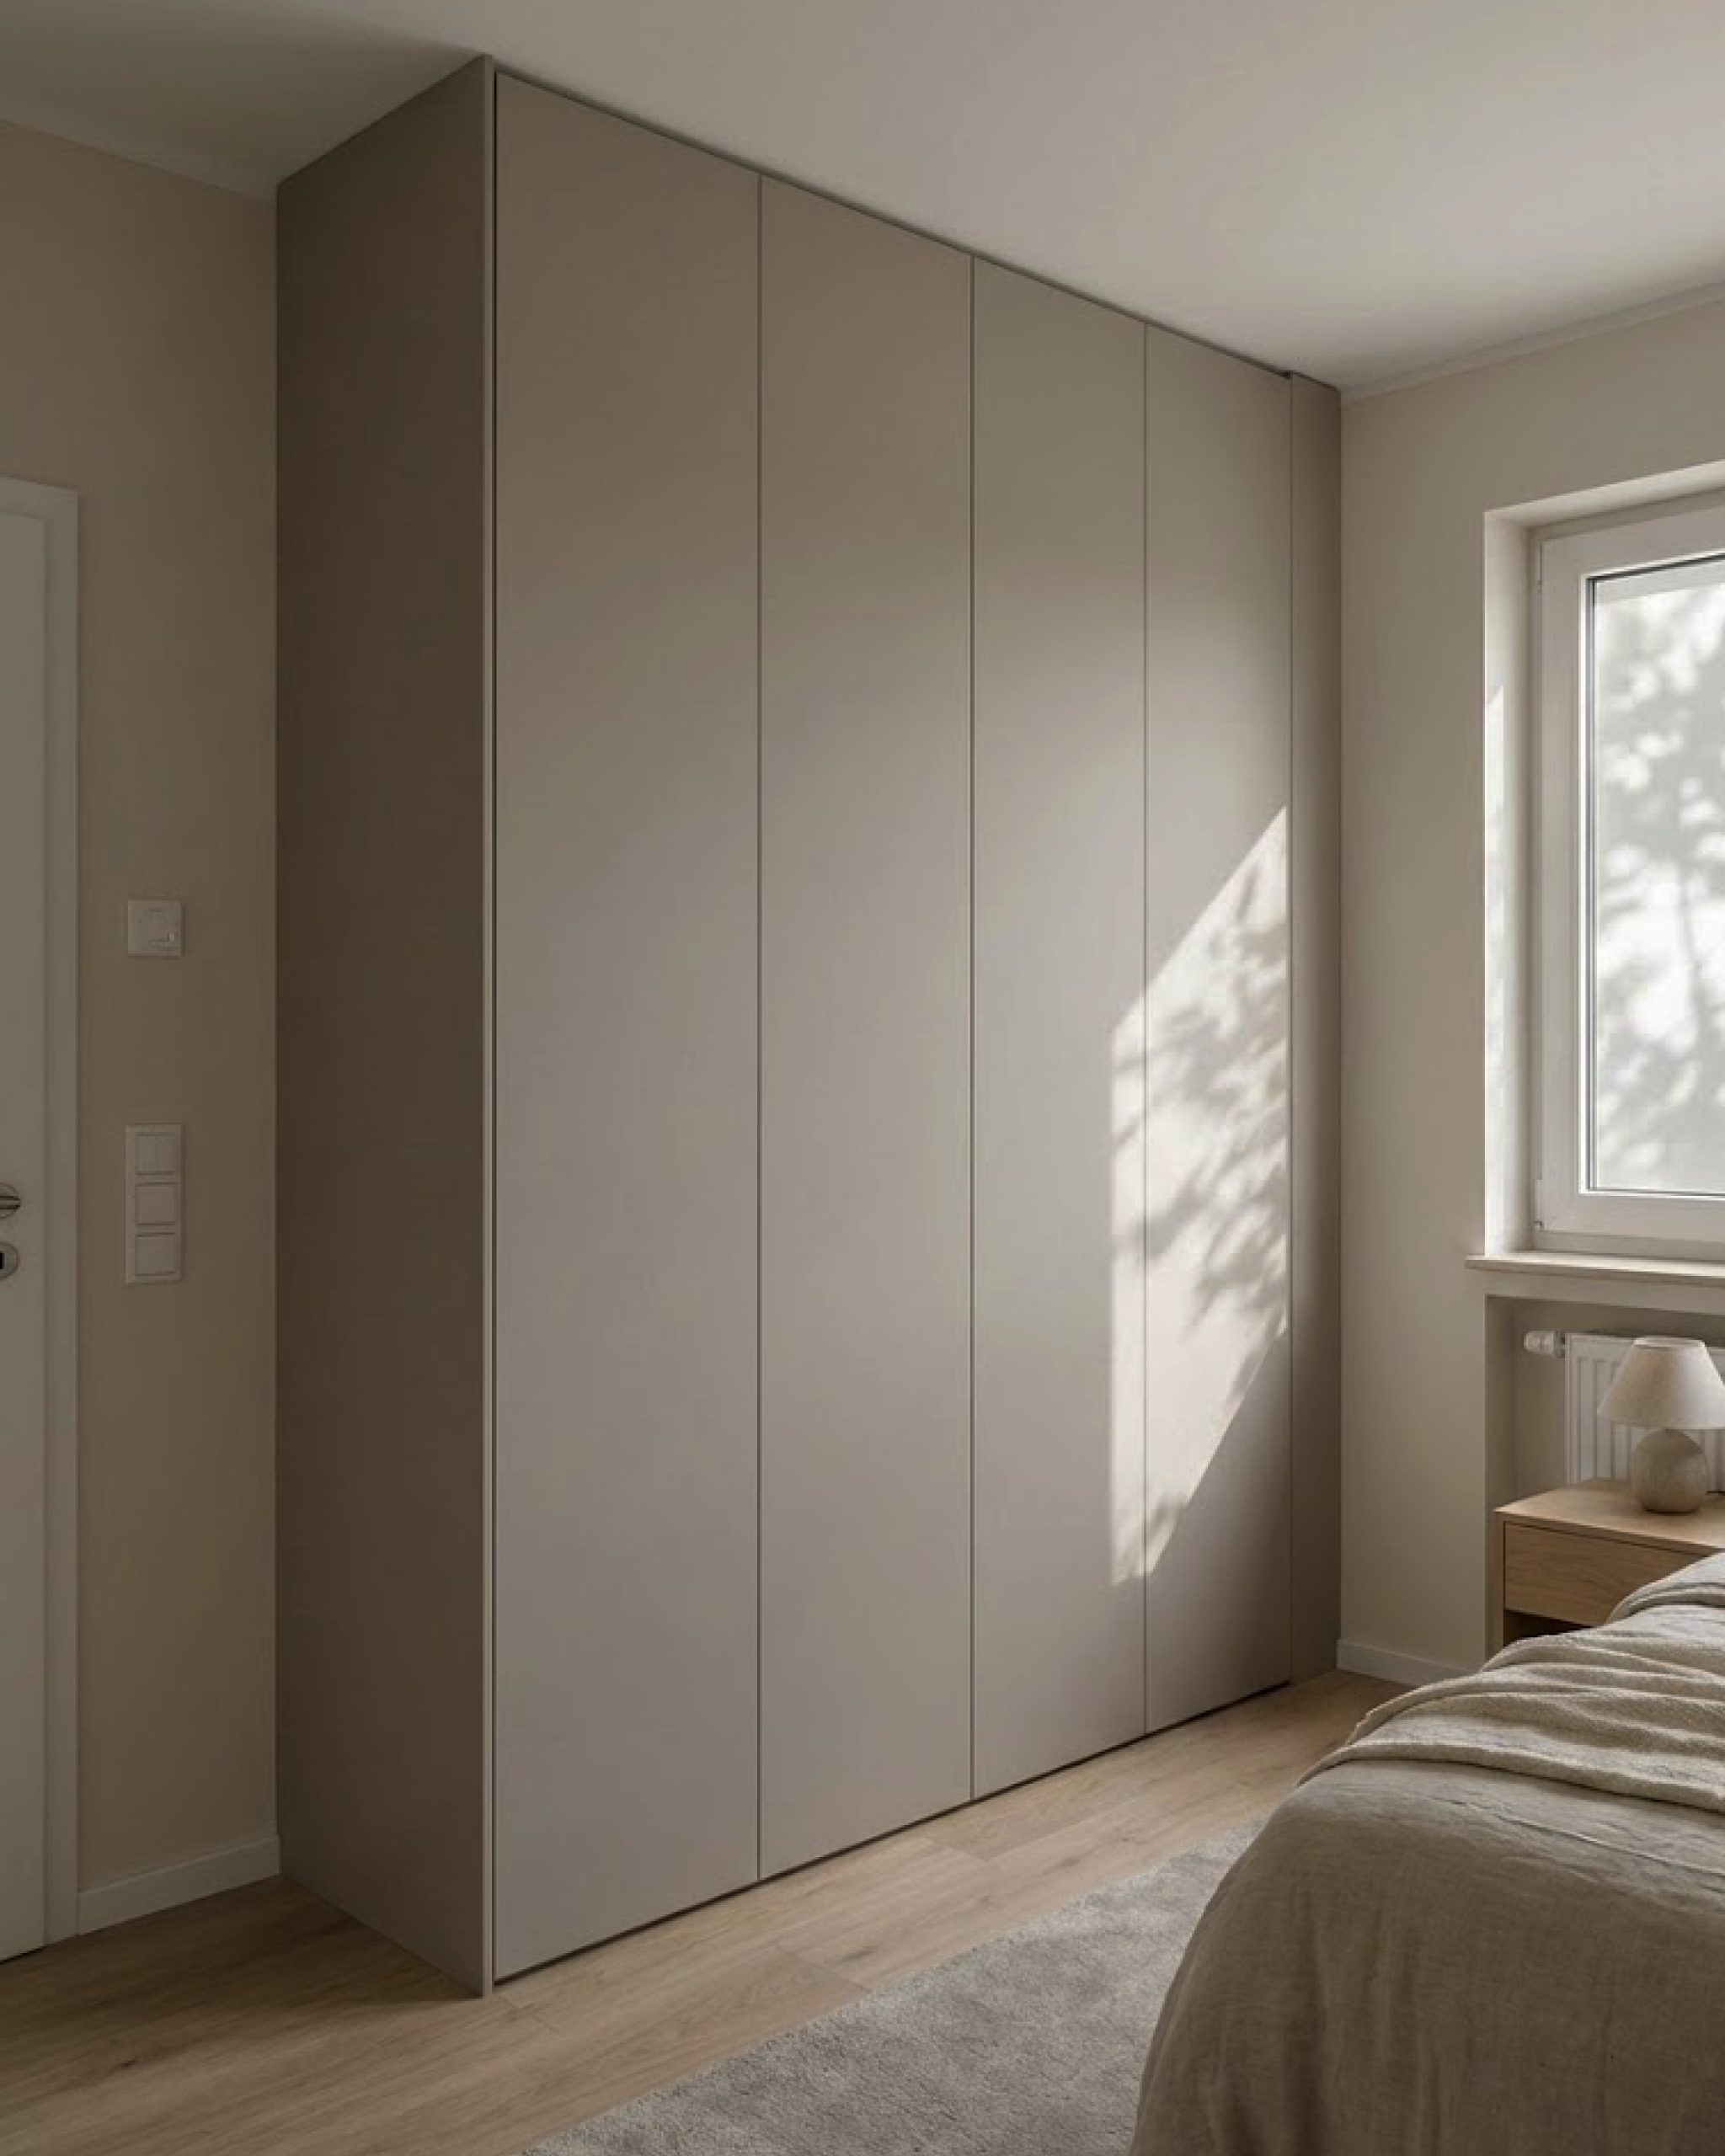
The most popular of all IKEA PAX hacks – and also the most comprehensive. The idea: place PAX carcasses in a niche or against a wall and clad them so the wardrobe looks like it's permanently built-in. For this, the gaps to the wall and ceiling are covered with MDF panels or plasterboard, the plinth is concealed, and everything is painted in a uniform color. In the end, no one will be able to tell that these are IKEA furniture pieces.
The DIY route requires a fair amount of work: having MDF panels cut, building a wooden frame as a substructure, filling, sanding, and painting everything. Matching the color to the IKEA doors is often the biggest challenge – IKEA white is not the same as DIY store white. Expect to spend a whole weekend or more. But the result is truly impressive, and online you can find detailed step-by-step instructions with material lists and measurements.
For those who shy away from DIY efforts but still want the built-in wardrobe look, Select Living offers a ready-made solution: floor-to-ceiling doors that cover the plinth. Custom-made ceiling-height fronts that reach up to the ceiling. Side panels and wall panels that seamlessly clad the carcass. And a top unit for extra storage space above. All available in over 30 colors, perfectly color-matched, and custom-cut from a carpentry shop in Gelsenkirchen. You only replace the visible parts – sawing, filling, and painting are completely eliminated.
2. Change Handles – 10 Minutes, Big Impact
The fastest of all PAX hacks. Brass knobs for a vintage feel, black handle strips for an industrial look, leather handles for Scandi vibes – on Etsy and in furniture stores you'll find hundreds of accessory options that fit directly into the existing IKEA drilled holes. For each door, you'll need two minutes and a screwdriver. Clever tip: ceramic or wooden knobs made of oak, for example, also instantly give the wardrobe an individual character.
3. Handleless with TIP-ON
Even more minimalist: omit handles entirely. TIP-ON fittings can be retrofitted – the door opens with a light tap. It looks extremely clean and is a popular upgrade for those who like the matte, minimalist look. The fittings cost around 10 euros each and assembly is self-explanatory.
4. Paint PAX Wardrobe Doors
The classic among budget hacks. Important: the IKEA surface is melamine – paint won't stick to it without preparation. First, sand (grit 120–180), then apply primer, then two to three coats of lacquer paint with a foam roller. Chalk paint in matte is popular for a textured, modern look. Or you can opt for matte lacquer in an elegant shade – that immediately looks higher quality than the IKEA standard.
Sounds easy, but has pitfalls. For a wardrobe with six doors, you'll easily spend a whole day – masking, priming, drying, painting, drying again, second coat. And the edges are the trickiest part: this is where the paint peels most easily if it hasn't been cleanly applied. Nevertheless – for the price of a few cans of paint and some creativity, your PAX wardrobe will get a completely new look.
5. Apply Foil
Even cheaper than painting, but honestly also shorter-lived. Applying self-adhesive furniture foil to a door over two meters high without bubbles is a patience project. After one to two years, the edges start to peel, and then it quickly looks worse than before. As a short-term refresh for little money, it's an option – but not really a permanent solution.
6. Apply Decorative Molding – the Shaker Style
One of the most shared IKEA Hack PAX projects on Instagram. The idea: glue flat wooden strips or decorative moldings onto the smooth wardrobe doors to create a recessed panel or Shaker design. Then paint everything in one color – and the country-style wardrobe is finished. The material doesn't cost much and the result can look truly inspiring.
In practice, you'll need a miter saw (or at least a miter box with a Japanese saw), mounting adhesive, and patience. The miter cuts in the corners must be clean, otherwise, every gap will be visible. Tip: first lay all the strips dry and fix them with masking tape before gluing. If you're not so experienced as a DIYer, practice the miter cuts on scrap pieces beforehand – that saves frustration and material.
7. Ribbed Look with Wooden Slats
The interior trend of recent years: vertical slats on the door surface for a distinctive ribbed texture. In DIY, you glue narrow round rods or half-round moldings evenly next to each other onto the panel. Looks fantastic on Instagram and Pinterest – but building even spacing over 230 cm in height yourself is significantly harder than it looks. If you want perfection, look for ready-made ribbed fronts. Machine-milled grooves are more even than you could ever achieve by hand.
8. Conceal the Plinth
Every PAX reveals itself through the visible plinth at the bottom – the gap between the bottom edge of the door and the floor, which exposes the carcass. A front-mounted strip made of MDF panels, cut to the correct height and screwed on, solves the problem practically for a few euros. A drill and a board of the correct thickness are sufficient for this. Even more elegant: floor-to-ceiling fronts that reach to the floor and completely cover the plinth. These are now available from several suppliers ready for the PAX.
9. Close the Gap to the Ceiling
Next to the plinth, the second biggest weak point: the space between the top of the wardrobe and the ceiling. Depending on the room height, this can be 15 to over 100 cm of dead space – a dust trap and wasted storage. There are several options here, and the right one depends on your ceiling height:
Crown molding – quick, inexpensive, visually conceals the transition. Works for small gaps of 5–10 cm. A board or decorative molding on top and the wardrobe immediately looks more finished.
MDF panels as a trim – completely closes the gap. Needs to be filled and painted. A practical hack for PAX wardrobes in niches.
Drywall – the most elaborate DIY method. Slats, plasterboard, filling, sanding, painting. Ends up looking like a real built-in wardrobe, but requires experience and a weekend.
Custom-made ceiling-height doors – the door extends beyond the carcass up to the ceiling. A continuous surface, no element needed on top.
Top unit – a separate cabinet on top, with its own doors and shelves. A clever solution because it closes the gap AND provides additional storage space for seasonal clothing, shoe boxes, or accessories.
10. Build PAX as a Walk-in Wardrobe or Hallway Wardrobe
Multiple PAX wardrobes side-by-side on one or two walls – this is the basis for a walk-in closet or a hallway wardrobe. In principle, it's simple, but five white IKEA doors in a row look like office archives, not a dream walk-in closet. The IKEA PAX hack here involves making the system character disappear.
What helps: uniform fronts, a continuous plinth, side panels in the same color. Some build an open shelf unit between two carcasses – for shoes, bags, or as seating. Integrated LED lighting and pull-out drawers with shelves for accessories complete the dressing room. Customization goes as far as your creativity allows.
What does an IKEA PAX Hack cost?
Changing handles: €30–€100. Painting doors yourself: €50–€150 for materials. Shaker moldings: €80–€200 plus paint. MDF cladding for the built-in wardrobe look: €200–€500 plus a weekend's work. Professional fronts: from approx. €160 per door, upgrading an entire wardrobe with exterior sides and panels: €1,000–€3,000. For comparison: a built-in wardrobe from a carpenter costs €5,000–€10,000. You'll best find inspiration for your budget by combining different hacks – not everything has to be the most expensive solution.
Frequently Asked Questions about PAX Hacks
What is the easiest IKEA hack for the PAX?
Changing handles. 10 minutes, a screwdriver, done.
Which hack for PAX lasts the longest?
Professionally manufactured fronts and claddings. Foil and chalk paint need refreshing after one to two years.
Can I combine multiple PAX hacks?
The best results are achieved exactly this way – new fronts + plinth panel + crown molding + new handles. The more you combine, the less it looks like IKEA.
Do I need craft experience?
Not for handles and LED strips. For painting and moldings, practice is helpful. For drywall and sloped ceilings, you should know what you're doing – or get inspiration on YouTube before you start.